How to Draw a Cool Dragon


1
The first thing we need to do is draw out the basic guidelines and shapes to form a workable frame to begin drawing our new dragon with. Start with drawing out the shape of the back part of the body or torso. You will then add the smaller shape for t

2
Now that the frame work is all done, you can begin sketching out the shape of the dragons head which is going to be drawn in a front, top view. Be sure to draw the dragon's horns which from this angle seem to stand straight up. Add the detailing to t
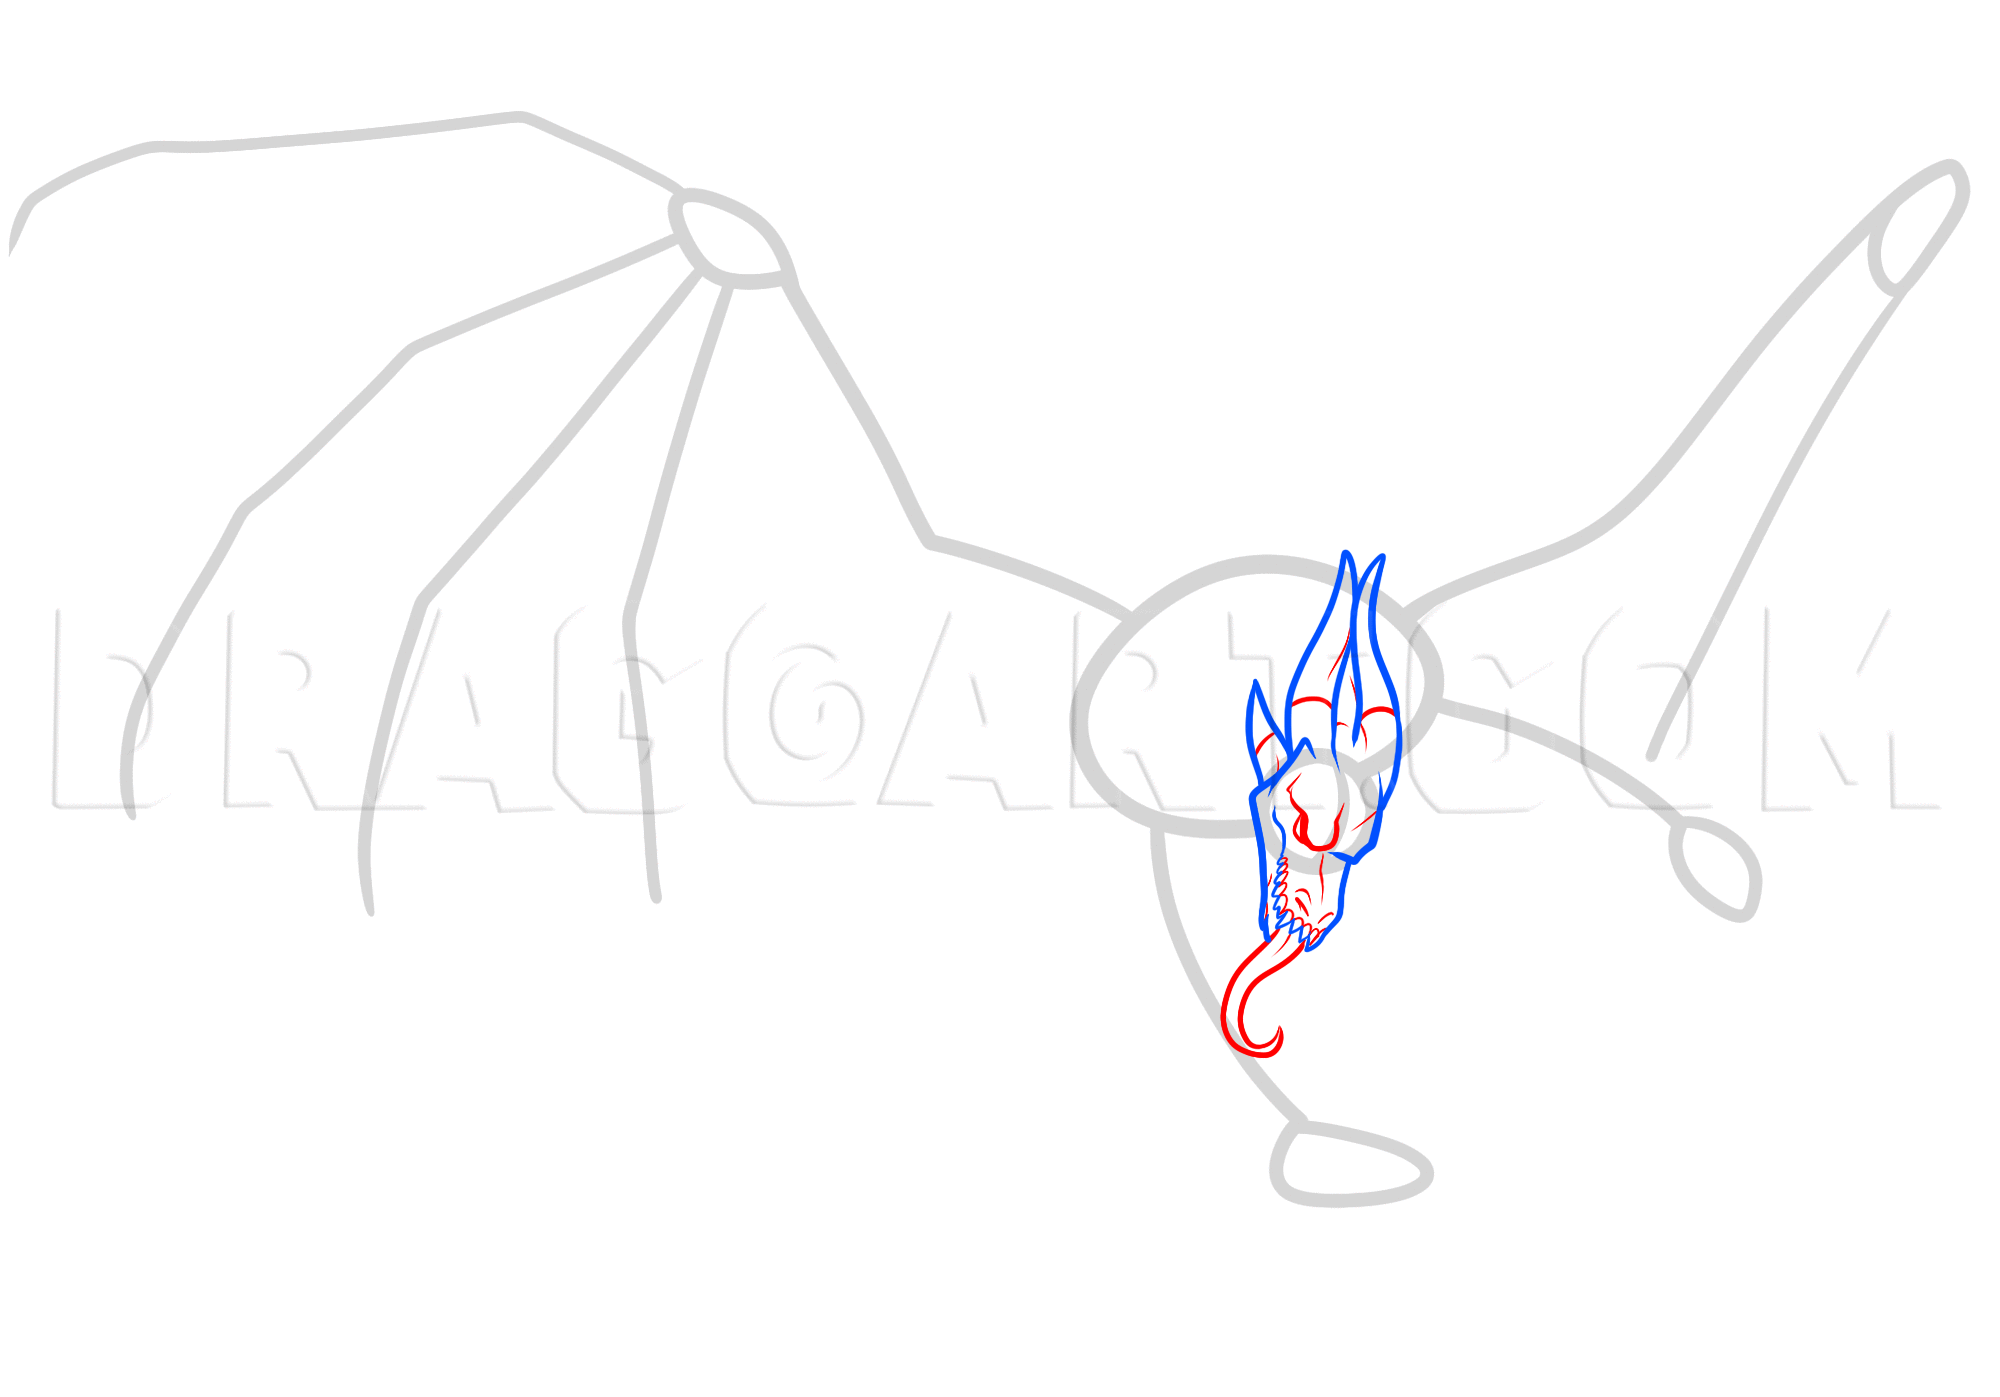
3
Sketch in the dragons face by adding the eye and nostrils as well as the crinkles and creases on the snout. You will then draw in the tongue which is slithering, then add the marking lines which separates the tissue from the bone of the horn. Before

4
Cool beans, the head is all set. Now we can start working in getting the body all drawn out. Start with the muscular shoulder, then work your way around until the upper part of the back, and right shoulder is sketched in. Be sure to add plenty of det

5
Continue the momentum by sketching out the very strong, muscular arms. Each part of the arm should be drawn with ease because of the amount of detailing and definition that is going into this dragon. When you feel confident that the dragon's arms are

6
Step six involves a lot of worl because you will be sketching out the strongest part of the dragon, and that's the legs. Start at the hip or upper thigh, and work your way down in a section by section style. Be sure that very line curves into the leg

7
Here all we will be doing is drawing out the powerful hands and strong feet for your dragon creature. Notice it is only the head, hands and feet that are dragon like followed by the wings. Sketch out the hands and feet like so, then sketch in all the

8
Simply draw out the tail, and move to step nine. This is probably the easiest step of the whole lesson.

9
Here you will be drawing out the actual arms for the wings. Notice that even the wing's arms are highly detailed and muscular. I did this to keep things in proportion with the rest of the dragon creature. Draw in the arms which start at the back, the

10
For the last step, continue to work on the wings in a steady fashion. A dragon's wings are probably the most important part to this reptilian species. It's almost like a peacock's tail to other male peacocks. When your wings are all done being drawn
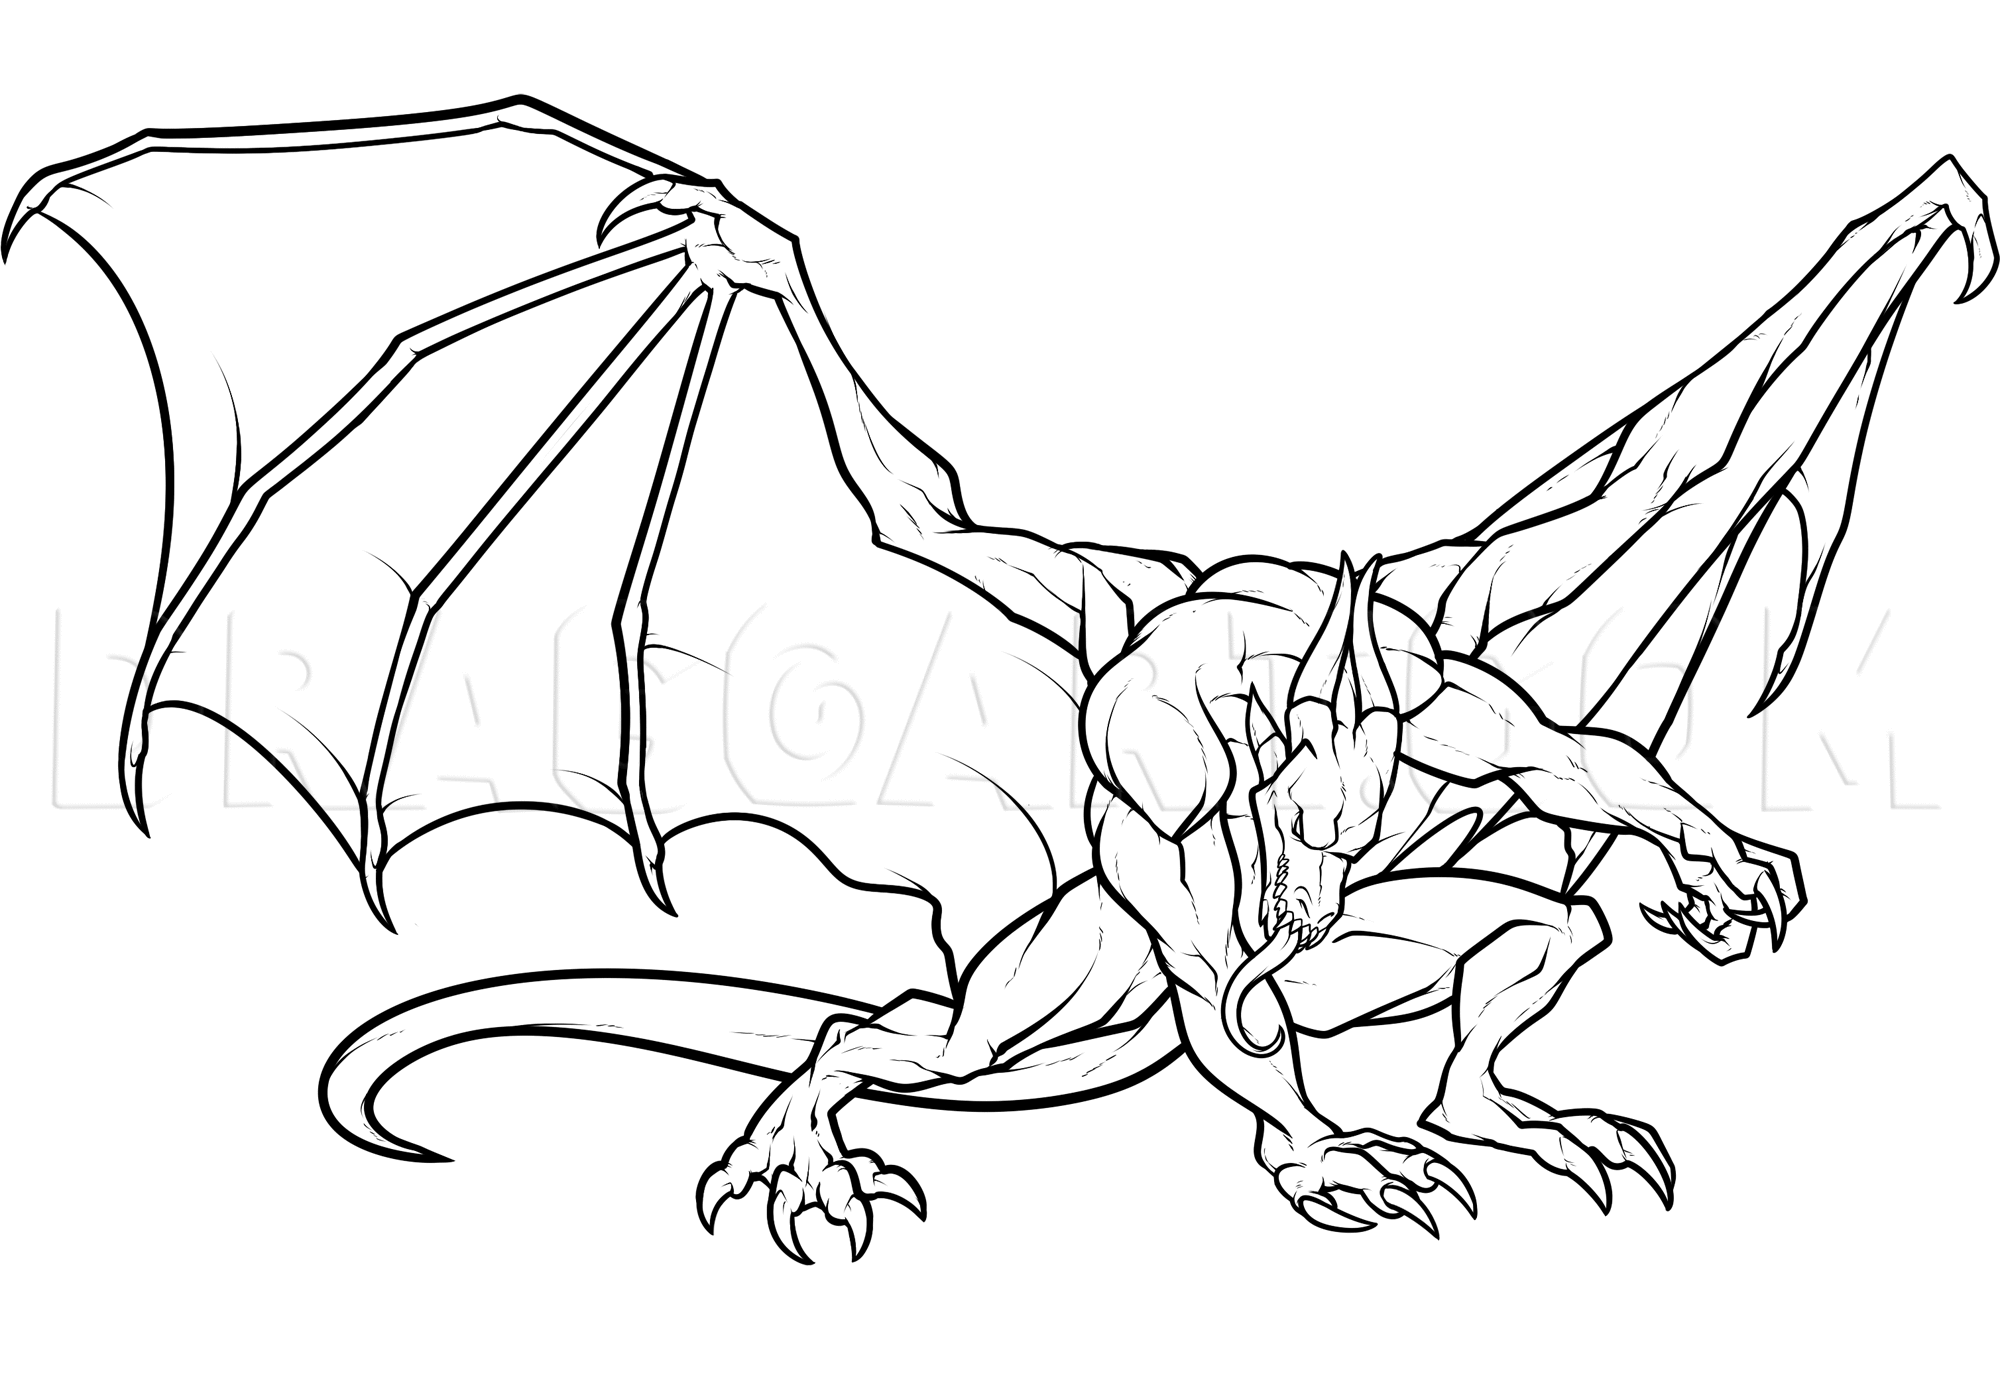
11
When you're done, the dragon should come out looking something like this. Now you can choose a pallet and color in your new creation. I hope you enjoyed the challenge to drawing a cool dragon.
Comments 0
Details
April 5, 2012
Description: Remember this guy? Yup, he is the beast that I drew while I was Livestreaming a few days ago. This lesson has actually been sitting in my folder for about three days counting today. Since it's the day before Easter, I figured that it would probably be a good tome to submit this tutorial on "how to draw an cool dragon", step by step. I know I already have a few cool dragons on the site already, but none of them are as cool as this humanoid version of a dragon. At first the creature was only going to have a mans body, but then I thought that adding wings and such would be even cooler. The total coloring and drawing time took me about an hour and a half. I wasn't sure at first what shade to color him in, so I went with a reptilian tone and I think it looks good. Anyways, this is one of my favorite dragon drawings that I have done in a while because of the body, pose, and the way that the wings are expanding. I think that all you dragon lovers will have a blast with drawing a cool dragon once again. Be prepared to make many mistakes if you are a newbie to drawing because this is going to be labeled 'intermediate'. That's all I have to say about this drawing lesson, now it's your turn to get busy with the goodness. Peace out people and like always, enjoy!


